Feeds:
Posts
Comments

I am so excited to announce the launch of my new website and business: Real Life Delicious! Since I am still a food evangelist (of course), my blog will continue on the new site. Now it will focus even more on helping and inspiring busy people to buy, cook, and eat real (and delicious!) food. The new website address is:

www.RealLifeDelicious.com

I hope you’ll head over there right now! While you’re there, definitely make sure and SIGN UP for my regular email updates. In addition to having my blog posts delivered right to your email, you will also receive a FREE copy of my new e-cookbook, Easy Recipes from Real Food, which I gotta say is fantastic — it’s basically a roundup, with full-color photos, of the recipes I seem to make over again — and did I mention it’s free?

The reason for this change is simple: I wanted to create a space where I could expand on some of the ideas I’ve explored in this blog as well as showcase the other things I’m working on. So, in addition to my regular blog posts and articles, I am now offering private kitchen consulting sessions and group classes. These programs are designed to help you reboot your family’s eating habits in a practical, real-life way. They are really amazing — super fun, informative, and inspiring. There’s a lot more info about all my programs at reallifedelicious.com, so please check it out.

Thanks so much for reading this blog for the last year and a half, and I hope you’ll continue with me on this journey toward a healthy, real, easy, and always delicious way to eat!

— Bevin Wallace

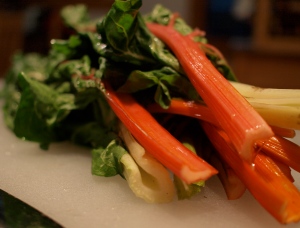
It’s one of those “dark, leafy greens” we’re supposed to be eating like 10 times a day. And you may have eaten it before and wondered why someone was serving you stringy weeds that taste bitter get stuck in your teeth. But I promise Swiss chard can be really tasty. Delicious in fact. The first few times I got chard in my organic box, I sighed, chopped up the chard, tossed it in a pan with some olive oil (which seems to work pretty well for most vegetables), and hoped for the best. But what I ended up with was undercooked, tree-like stalks and mushy, tasteless leaves. I decided chard was best for shredding into salads or, even better, as a garnish. Its leaves look beautiful under a wheel of goat cheese…

But the problem with that thinking is that chard is really, really good for you. Thanks to its combination of minerals, nutrients, and fiber, chard is like an anti-cancer pill. Plus, it’s an excellent source of vitamins A, K, C, E, magnesium, manganese, potassium, and iron — all things we want and probably don’t get enough of. And chard does seem to come in my box a lot. So, I did some more experimenting until I finally discovered this method of cooking chard. I guess it seems obvious, but the secret to cooking something with a tough stalk is to start cooking the stalks first, give them some time to soften up and mellow out, and then toss in the leaves.

This recipe makes a great and very quick side dish. Shallots enhance the chard’s flavor, which, in this dish at least, is nutty and savory and not at all bitter. My husband, who has always told me he “despises” chard, loved this. While I wouldn’t use the word “love,” the kids ate it happily, which is about all I can hope for when I’m serving something that slightly resembles the things poking out of the playground asphalt at their school.

Rainbow Chard with Shallots

Ingredients
1 bunch Swiss chard (doesn’t have to be the “rainbow” version, but it does look pretty)
1 small shallot
Olive oil
Red wine vinegar
Red chili flakes (optional)
Salt & pepper

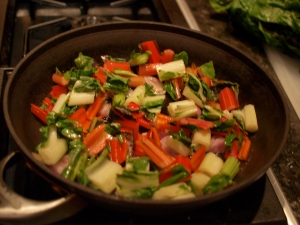
Give the chard a bath in a sink full of cold water and rinse. You may have to do this twice to get all the dirt and grit off. Dry on towels. Using a large cutting board, cut the chard’s leaves from the stalks by running a knife down either side of each stalk. You can also do this by hand by tearing the leaves off the stalks, but I found the knife method faster. Chop the stalks into one-inch pieces. Thinly slice the shallot. Heat the oil in a large skillet over medium-high heat. Add the chard stalks then the shallots and saute until the stalks soften and the shallots start to caramelize, about 10 minutes.

Slice the chard leaves into ribbons and add them to the pan. It will seem like a lot of chard at this point, but the leaves really cook down (like spinach). Add a few drops of vinegar and the red chili flakes; season with salt & pepper to taste. Continue cooking until the leaves are wilted, about 2-3 minutes. Serve immediately.

I know it’s a stretch to write a food blog post and even attempt a segue from the news about the passing of Steve Jobs, but here it is: Mr. Jobs liked things small. I recently read that he once had an aha moment while pondering the appeal of Mini Coopers and realized that they’re cool for really no other reason than because they’re small. Well, mini food is cool, too — think street tacos, soup in shot glasses, cake pops. And of course sliders. Actually, I’m not sure if sliders are really cool, but they are delicious and fun to eat. I think it’s because they’re “just right” in terms of proportion of meat to bread and, yes, they’re so damn cute — like an iPod Shuffle.

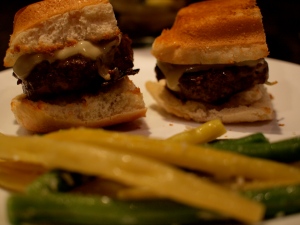
I made these sliders with ground elk, which is very lean and not gamey at all. Really. But if you don’t have a hunter in the family, these would be just as good (and almost as healthy) made with ground buffalo or turkey, or even grass-fed beef. For the buns, I had some leftover hot dog buns so I cut them in thirds, lightly buttered them, and stuck them under the broiler for about 2 minutes. Ciabatta is also good (no, great). I’ve seen tiny potato rolls in the bakery before, and I bet those would be perfect. I cooked these indoors on a grill pan because it was pouring out, but if you do cook them over an open flame, I would probably put them on a piece of tinfoil first so they don’t dry out. I served the sliders with a mixture of green and waxed beans that were blanched and tossed with a little olive oil, Parmesan, and lemon. And ketchup of course. It made a simple family meal that everyone in my family, even my slightly meat-phobic daughter, loved.

Sliders

Ingredients
1 lb. ground elk (or other lean meat)
1 tablespoon Worcestershire sauce
Pinch garlic powder
Pinch dried herbs (oregano or parsley)
1/4 cup bread crumbs
1 large egg
salt & pepper
Sliced cheese (I used Swiss)
Rolls or bread for buns (and butter)

In a large bowl, combine meat with egg, Worcestershire sauce, spices, and bread crumbs. Mix well with your hands. To make the patties, use about 1/4 cup of the meat mixture for each one and roll into a ball, then flatten slightly. Put the patties on a sheet of tinfoil, and use your thumb to make an indentation in the center of each one to keep it from shrinking into nothingness when you cook it. Heat a grill pan (or skillet) over high heat (I used my ancient Calphalon grill pan on my hottest gas burner). When it’s hot, cook the patties for about 6 minutes until browned, then flip and cook another 4-6 minutes depending on how you like them. Add the cheese (about a 1 1/2-inch square is all you need for each burger) during the last 2 minutes of cooking and loosely cover the pan with a lid. While cheese is melting, toast the bread and get out some salad plates; you won’t be needing the big ones tonight.

This recipe makes about 12-14 mini burgers. If you’re really hungry (like my husband), you will probably eat about eight. I ate three. Okay, maybe four.

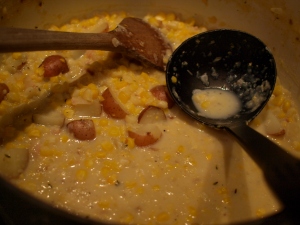
It’s officially fall, which makes me want to make soup. And for me the perfect shoulder-season soup is spicy corn chowder. Making it allows me to cook the piles of fresh corn I just can’t seem to stop buying as well as utilize part of the bushel of roasted green chiles I bought with visions of capturing the grand prize at my school’s fall festival chilli cook-off (which I didn’t end up entering — long story — so these will be added to almost everything I make or eat for the next several months).

Unlike most corn chowder recipes, this soup doesn’t call for cream or creamed corn or sugar. It’s relatively light and fresh tasting while also being plenty rich and satisfying. You can take the extra step of scraping the corn pulp into a bowl and squeezing it to obtain about 1/2 cup of corn juice to use to finish the soup, although I’ve tried it both ways and honestly couldn’t tell the difference. I know everyone doesn’t have access to Colorado’s locally grown Sweet Olathe corn, but I’m sure you can get something equally delicious at your local farmer’s market this time of year.

And just a little kernel for thought (sorry, couldn’t resist the, ahem, corny play on words): If you want to avoid genetically modified corn, which I think you might when you read studies like this one, then you’ll need to buy organic ears.

My kids loved this by the way! (No carrots, no celery, bacon and potatoes, need I say more?)

Corn Chowder

Ingredients
8 ears of corn
2 tbs. unsalted butter
1/2 onion, chopped
2-3 slices bacon, cut into small strips
Leaves stripped from about 6 thyme sprigs (just pinch with your fingers and pull down the stem)
1/4 cup flour
1/2 pound small red potatoes, cut in half or quartered depending on their size
1/2 cup milk (I used 2%)
Salt & pepper
6 cups water
2 roasted green chiles (peeled and diced) or one 4 oz. can of diced Hatch green chiles, optional

Peel the husks and silk from the corn. Using a sharp knife (I like a bread knife for this actually), cut the kernels from the corn. You will have a large pile of corn. If you want to extract every last drop of flavor from the corn, use a butter knife to scrape the pulp off the (now kernel-less) cobs into a fine strainer. Let sit over a bowl so corn juice drips into bowl (you can also squeeze gently with the back of a spoon). Set aside.

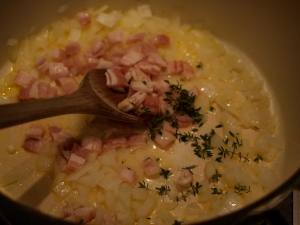
In a Dutch oven or heavy pot, melt butter over medium heat. Add onion, bacon, and thyme. Cook for 10 minutes until onion is translucent. Stir in flour and cook for another minute or two, stirring constantly.

Add water gradually while continuing to stir, and bring to a boil. Add potatoes and corn and a pinch of salt & pepper. Cook for 15-20 minutes.

Add milk to chowder and season to taste with more salt & pepper. Stir in green chiles if using (I suggest tasting them first to test for hotness; my experience is that these freshly roasted chiles vary widely and some are just too hot). Add reserved corn juice just before serving — and a healthy grind of pepper.

Southern Salmon Sauce

My sister in law is one of those people who is secretly good at things. Maybe it’s because she’s from the south and is therefore more polite than most people, but she totally downplays her abilities. She’s a ringer on the tennis court even though most casual acquaintances don’t even know she plays. Her house looks professionally decorated even though she did it herself, and did it without uttering one word about trips to lighting galleries or fabric showrooms.

And she’s secretly a great cook, too. Every time she invites us over for dinner, she says something like, “It’ll be really casual; we’ll probably just pick up barbecue or make burgers.” And then we show up and she’s made a gorgeous salad, whipped up some heavenly-smelling side dish, and is prepping a trophy fish for the grill. And to put on that fish, she often makes this especially delicious sauce. After swooning over it about five times, I finally asked for the recipe.

Except, of course, there really isn’t a recipe. She basically told me what she puts in it, and what her mother puts in her version, and I fiddled around with it until I got close enough to share this. This sauce is savory and tangy at the same time, and it elevates any piece of fish — whether grilled, broiled, or baked — from a midweek basic to something you could — and should — serve to company. But don’t wait for guests to make this. And don’t leave out the butter; that is one ingredient both southern ladies (politely) insisted upon. I couldn’t agree more.

The only thing even slightly difficult about making this is you need to peel some fresh ginger. I do this with a knife, and you’ll need at least an inch worth from the ginger root. Once the ginger is peeled, you can either mince it finely with a knife or run it over a fine grater or microplane. I especially love this on salmon, but it’s great on halibut and bass, too.

Pan Sauce for Fish

Ingredients
1 tbs. fresh ginger, grated or minced
1/2 cup soy sauce
2-3 scallions, finely sliced up to about midway through the light green part
Pinch cayenne pepper
1 pat of butter (1/2 tbs.)
Pinch brown sugar (optional)

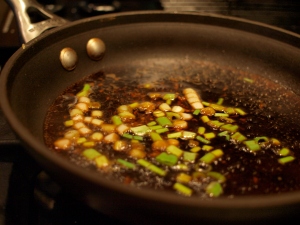
Grate the ginger and slice the scallions. In a small skillet, heat the soy sauce over low-medium heat. Add scallions, ginger, and cayenne. Simmer until sauce starts to thicken. Add brown sugar if you want it a bit sweeter. If it seems too strong, add a couple tablespoons of water and continue simmering. Cook fish. Just before serving, add the butter and let it melt in the sauce. Spoon over fish.

Incredibly Edible

Yep, this is a picture of my kids in Paris. Paris, France. A couple years ago when my husband was between jobs and the kids were still young enough to miss school, we spent a winter and spring skiing and living in France. But my family’s travels are really not the point of this post. (Although I must say, there’s nothing like a couple months in a the markets and cafes of France to wean the little people off mac-n-cheese and chicken nuggets; so what if the kids discovered baguettes and chocolate chaude, France was still a turning point in my family’s culinary life.)

What is the point here: eggs. I think the French make the best eggs in the world. Ever since the first time I went to France, I’ve loved those little omelettes they serve in just about any cafe or brasserie. (And yes, I know Les Deux Magots is touristy, but to me it’s still the epitome to Parisian literary cafes — and they make damn good eggs.) It seems like the worst omelette in France is better than any of the overstuffed, football-like behemoths you get in American breakfast joints. The French versions are creamy, delicate, and just the perfect size. And believe me, I’ve tried to recreate them many, many times over the years, and always failed.

Then I went to cooking school and — voila! — les oeufs were the subject of our very first lesson. If we had done nothing but chat and drink wine for the rest of the course, I would have gotten my money’s worth. So now I am thrilled to say that French omelettes are not just for European family vacations anymore; they’ve become a large part of our weeknight dinner rotation. With a simple salad (and French bread, mais oui), they are about the perfect meal, even for finicky kids like mine. Yes, you have to cook them one at a time, but they only take about two minutes each.

Here’s how to make les oeufs parfaites commes des Francais:
First, get yourself an 8-inch nonstick pan and protect it with your life. I’m not normally a huge fan of nonstick pans, but for this purpose nonstick is crucial and will probably save your some tears. If your 8-inch pan is old or scratched, get a new one. It doesn’t have to be expensive because you won’t be using it for high-heat applications or anything else actually. Don’t use soap on it, avoid contact with all utensils except a rubber spatula, and store it wrapped in a dishtowel.

French Omelette

Ingredients:
3 large eggs (These will be much better if you have free range, organic, very fresh eggs.)
1 pat of butter (unsalted best)
1 tbs. shredded Gruyere cheese (Any kind of cheese you like will taste great, but this is traditional; you really only need about 4-5 strokes over a cheese grater’s worth here, so splurge on the cave-aged kind if you can find it.)
Salt & pepper
Chopped fresh herbs or herbes de Provence (optional)


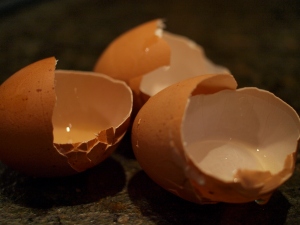
Get all your ingredients out and ready to go; this is a very fast-moving process. Crack the eggs into a bowl and beat lightly with a fork; add a pinch of salt. Put the butter in the pan over medium heat. When the butter has melted and gone from foamy to not, pour the eggs into the pan.
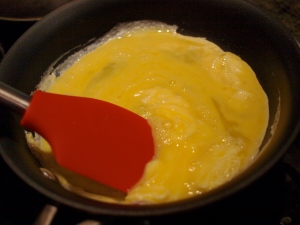

Immediately begin stirring the eggs with a rubber spatula and keep stirring them the entire time. When very soft curds begin to form (about 1 minute), you can slow down, let your eggs rest briefly, and sprinkle them with the cheese, pepper, and herbs.
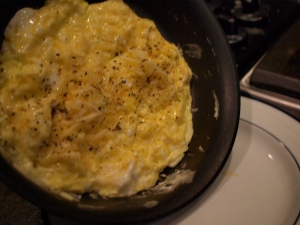

Lift the pan off the heat. The eggs should be very slightly solidified but still very moist. If there are bits that are completely uncooked, tilt the pan and let the egg run over to the edge to cook slightly. The goal here is to have the eggs just cooked but not browned on the bottom at all.
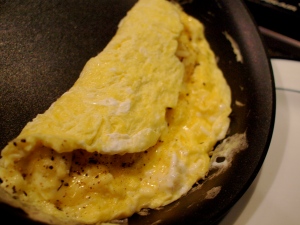

Tilt the pan over a (warmed is nice) plate and use your spatula to fold the top third over, then gently slide the omelette onto the plate, folding the last third back on itself to create a roll.
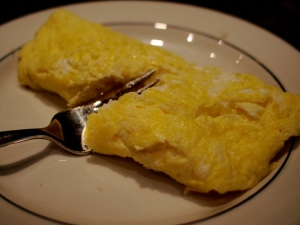

Eat immediately. (Just like most eggs, they taste crappy when they’re cold.)

Some variations: My son, being a bit of a pain, likes “stuff” in his omelettes (and who am I to turn down a kid’s request for vegetables?). So for him, I first chop and saute whatever veggies I’m using, then set them aside, proceed with the omelette-making, and add the stuff when I add the cheese (after I’m done with the stirring). We’ve made versions filled with diced red peppers, tomatoes, mushrooms, and carmelized onions. If there’s any ham or cooked bacon around, that’s obviously a nice addition, too. Me, I love them straight up.

Bon appetit!

Apparently no one really knows the answer to that question. And therein lies the rub, if you ask me. When I first read Robyn O’Brien’s book, The Unhealthy Truth — which convincingly argues that eating GM foods can be linked to all kinds of health issues, including cancer and the rise of childhood allergies and autism — I immediately decided that GMOs (genetically modified organisms, including animals, crops, and milk) are the worst example of corporate greed and malevolence in recorded history and vowed never to put another morsel of GM food into my or my family’s mouths. So there, Monsanto.

For those of you who don’t follow the GMO controversy, here’s a little primer on the subject: A genetically modified organism (GMO) is one who’s genes have been altered in a lab using genetic engineering — essentially the DNA molecules from different sources are combined to create a new set of genes, which is then inserted into another organism such as a plant seed or animal. This can be done for a variety of reasons, for instance to create a breed of corn that is resistant to chemical herbicides or higher-yielding wheat crops. The US company Monsanto creates “Roundup-Ready” seeds that are resistant to the chemicals in Roundup herbicide, which allows farmers to grow more corn using more pesticides (and the company even patents these seeds). Today the USDA says that over 81% of all corn and over 88% of all soybeans grown in the US are GM. This is controversial for several reasons, including concerns that GM foods are unsafe and growing them threatens biodiversity and the environment. If you read studies like this one, you’ll get a feel for the arguments against GMOs. GMOs have been banned in 27 countries, including all of Europe, by the way.

But then I read Nina Federoff’s Op-ed in The New York Times extolling the benefits and safety of GM crops while explaining why the world truly needs more, not less, of them — which kinda made me mad but also made me think. What if GMO crops really can eliminate world hunger? What if scientists really could create more nutritious wheat? Hmmm, that’s not so bad, right? Except, it’s not clear that those GMO promises are panning out. And there’s alarmingly little non-biased research and information out there about GMOs. Many non-GMO activists feel that the seed companies like Monsanto thwart efforts to conduct truly independent research. This article explains how the corporations basically have veto power over which tests get conducted and also which data gets reported. It’s pretty icky. And, well, you gotta wonder what they’ve got to hide, right?

Which I guess brings me back to the beginning. I don’t know if eating GMOs will give you cancer, alter your kid’s brain chemistry, or make hair grow on your tongue (like it apparently did to some hamsters in Russia). And neither does anybody else. So, for now I’m sticking with my non-GMO stance. Which goes something like this: Whenever possible and reasonable, avoid foods that have been genetically altered in any way.

In case you’re wondering how to do that, it’s simple:
1. Buy organic. Foods that are certified organic cannot by law (knowingly) contain GM ingredients.
2. Buy local. You’re pretty safe buying from farmer’s markets because most GM crops are grown by large, industrial farms not your local mom-and-pop.
3. Avoid the four top GM crops: corn, soy, canola, and cottonseed. If you do buy these, buy organic. This is one very good reason to avoid processed, packaged foods; if you read the label on a typical box of cookies, you’ll find several corn derivatives and probably soy and canola, too.
4. Look for the Non-GMO Project label. This is not widely used yet, but it’s worth knowing about and supporting. Here’s what it looks like:

So, what we’re left with is…real food. Hey, what a concept.

It’s Still Summer

So what if my mosquito bites are gone, the pool bag has been replaced by book bags, and our weekends have been taken over by football — it’s still summer, dammit, and I for one am not so ready to let go. Okay sure, we have to get up at 6:30 in the morning, so the al fresco dinners at the pool are probably not such a good idea. But, even though we have homework and soccer practice, we can still have picnic suppers and make homemade popsicles, can’t we?

One of the things I’ve tried to do with this blog is show that family meals don’t have to be painful exercises in cajoling and whine-endurance. And never is that more true than in the summertime, when meals can involve campfires and interludes of skateboarding. But once we get into the grind of after-school activities and math worksheets, it’s easy to understand how we leave all that summer fun behind and find ourselves in a dinnertime rut. But I contend it doesn’t have to be that way — at least not all the time, and at least not yet. And yes, if you think I’m writing this for myself as much as anyone, you’re right.

So, in the spirit of keeping summer alive — if only for the food — here are some strategies that seem to be working for me.

Pick one night this week to have a family picnic.
Pack your supper in a basket (the cuter the better) and bring it to a park. It’s amazing what kids will eat when it’s been pulled out of a picnic basket, plus you really don’t have to cook — which is nice, seeing as how it’s still summer. We did this the other night, and this is what we brought: one rotisserie chicken from the grocery store, one dry sausage (I used to get these at Napa Style, but they don’t have them anymore, so I now order from Il Mondo Vecchio in Denver; the Vero y Pepe Salami is incredible.), raspberries, cheese (Rembrandt aged Gouda), grapes, a chocolate bar, and of course a baguette. Oh and a bottle of Bandol. Don’t forget: knife, plate or cutting board, and napkins.

Go to the farmer’s market. We think of this as a family activity, but even though the kids are in school and playing sports on Saturdays, I still try to swing by and pick up my summer food trifecta: corn, tomatoes, and peaches. These three items are at their peak of perfection as I write this. How can it not be summer when we’re grilling ears of corn and making peach ice cream, right?

Cook outside. Not revolutionary, I know. In the summer, we do this almost every night because our house in not air conditioned — and sometimes if I’m cooking inside I tend to get a little cranky. Then, as soon as school starts, it’s tempting to boil pasta instead of grill fish. But I am resisting as long as possible; the pasta days will be here soon enough. I suggest eating outside, too. A little bit of backyard skateboarding or baseball throwing during the meal is okay (since it’s summer).

Grill peaches. The peaches are perfect right now in case you hadn’t notices, and it’s too hot to bake a pie or cobbler. Grilled peaches make a perfect, relatively healthy dessert — they caramelize and sweeten into something satisfying and really, really delicious. Here’s the recipe:

Grilled Peaches
Ingredients

6 Peaches (they should be ripe but not overly ripe; they should also be organic because peaches are one of the Dirty Dozen)
1-2 tbs. balsamic vinegar to taste
Brown sugar
Olive oil (not the fancy oil you drizzle on salads; basic olive oil is best as it adds less flavor to the already perfect-tasting peaches)

Preheat your grill if it’s not already hot from dinner. Rinse and dry the peaches. Cut them in half and remove the pit. Pour the vinegar in a small bowl and brush onto peaches with a pastry brush or paintbrush. Sprinkle with brown sugar. Brush the grill with a light amount of oil. Place peach halves on the grill and cook for 4-5 minutes. Turn over and cook for a few more minutes until very soft but not falling apart. Serve with ice cream. Or not. Swoon.

Happy Hours

It’s no secret that I think about food a lot. Okay, almost all the time. Even when I’m on vacation and staying 30 miles from the nearest town or market, I still want to eat food that’s delicious and fresh. And since I seem to care more than most people about what’s for dinner, I’ll happily volunteer to plan meals, shop, and cook — to a point. The empty can of Cutter and proximity of a refrigerator full of chardonnay notwithstanding, I don’t want to spend my entire vacation in the kitchen. I want to be out there hiking (bear spray in hand), canoeing, and fly-fishing with my family, not to mention reading a cheesy novel on the deck.

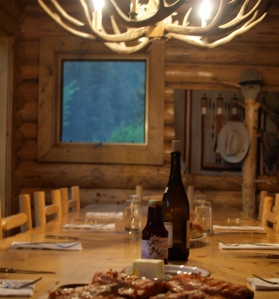
So, on vacation we stick with simple favorites (grilled chicken, enchiladas) and then improvise a few easy and quick dishes based on what’s available at the produce-challenged market in town. But what sets these vacation suppers apart from a typical weekend night at home is that the meals come together during my idea of a good, old fashioned happy hour — i.e. the adults are fiddling around with the grill and shredding lettuce with real cocktails in their hands while the kids are playing football, shooting arrows, planning skits with their cousins, and otherwise generally ignoring their parents. Each meal turns out to be a special event — not necessarily because the food is extraordinary, but because getting it to the table was so much fun for everyone.

But some of the food is extraordinary. While some things like elk fajitas and huckleberry-barbecue salmon just taste great when you’re in a log cabin in the woods, others, like this super simple asparagus pasta, are delicious — and easy to recreate — anywhere.

Sautéed Asparagus Pasta

Ingredients
1 lb. fresh asparagus
1 lb. fresh mushrooms
olive oil
1 clove garlic, finely chopped
A few fresh basil leaves
1/2 cup white wine (can be poured directly from glass)
1/4 cup milk or cream
1 package spaghetti (whole wheat if you can get it)
salt & pepper
Shredded Parmesan or Romano cheese

Cook the spaghetti in a large pot of well-salted water. Drain and reserve on cup of the cooking water.

Heat a cap-full of olive oil in a large skillet and then add garlic. Use scissors to cut the basil into ribbons and add to the pan. Rinse the asparagus well, snap off the ends (asparagus is very nifty in that it usually will naturally break right where the ends start to get tough, so I think the best way to handle it is to snap each spear individually), and cut into 1-inch pieces. Add to pan. Clean the mushrooms (if you wash them, allow them to dry fairly well; or you can just wipe off the dirt with a paper towel), cut them in quarters and add to the pan. Feel free to add any herbs of spices you can find; our selection included some oregano and “Italian Seasoning” I suspect was from the 1980s. Add wine and allow to cook until it doesn’t smell “boozy” anymore. Add milk or cream. If the sauce is too thick (or if you don’t feel like you have enough of it), stir in some of the pasta water and allow it to cook down a few minutes. Add pasta to the pan and toss to mix well. Season with sat & pepper. Add some cheese to the individual servings. We served this with buttered ciabatta toasts (huge hit) and a simple romaine salad.

If you have kids who don’t like “mixed food,” this is an easy meal to deconstruct, by the way.

A few weeks ago I started making a list of all my favorite things to eat. I was doing this partly because I had thought of including it on the “about me” page on my new website (which is coming very soon, yay!) and partly because I love making lists, especially food-related lists. And partly because I was probably hungry. But instead of throwing the whole list up on a page where it would languish uselessly, I decided to blog about my food loves instead. So consider this post about strawberries the first in a series. Each post will sing the praises of some food I happen to love (or am loving that week) and include at least one recipe for said food.

Of course my Foods-I-Love list is a seasonal one. While I love cassoulet and creamy potato-leek soup, I don’t think about them much this time of year. Right now I love strawberries. The big, fat, perfectly sweet-tart berries you can only get in the summer. I love strawberries because they’re delicious but also because they really make me feel great. In addition to 100 g. of vitamin C per cup, which is almost as mush as in OJ, strawberries are high in fiber, calcium, magnesium, folate, and potassium — all good things, especially in hot weather. Recent studies have linked eating strawberries to improved memory function and reduced risk of heart attack and cancer. All that, at about 50 calories per cup.

During both my pregnancies I craved strawberries. I bought them in bulk at the farmer’s market (Both my kids were born in the fall, so I had perfect strawberries to offset the fact that I was carrying around 40 extra pounds during 100-degree weather.), and I got very creative with them, as only a pregnant woman can. I would stack strawberries on my toast, use slices of them for mini Parmesan sandwiches or in wraps with cream cheese and turkey, eat them by the handful as a snack with almonds, and of course plop them in my drinks (they were something to look forward to at the bottom of yet another glass of mineral water or iced herbal tea). During that time, I came up with several strawberry recipes that have withstood the test of (less-hormonal) times. While I don’t make too many turkey-strawberry wraps anymore, I do still occasionally make strawberry-pecan pancakes on weekends, and my strawberry salad has become a family favorite.

There are plenty of versions of strawberry salad out there, but I think mine is different enough to be worth trying. This recipe is on the menu of my husband’s and my fantasy restaurant — a place that would serve all the favorite meals we make at home just the way we like them, without messing up our kitchen. Like with all great dishes, the fresh ingredients each speak for themselves and also blend together perfectly. It’s simple to make and easy to adapt to your family’s tastes (Don’t like spinach? It’s also delicious with romaine or green leaf lettuce. I use spinach because it’s also in season and so awesome right now. Goat cheese would be a nice change, too.) Oh, and this salad is also easy to disassemble for kids who don’t like their foods to touch. I should know.

One last note: I can’t write about strawberries without a reminder that strawberries are one of the “Dirty Dozen,” in fact I just checked and they are currently ranked #3 on the list of conventional produce that is the most contaminated by pesticides. As if that weren’t bad enough, the state of California (where about 90% of U.S. strawberries are grown) just approved the use of methyl iodide, which has been called “one of the most toxic chemicals on earth,” as a fumigant in strawberry fields. Whether or not the methyl iodide seeps into the berries themselves seems to be up for debate, but I don’t like the sound of it. Buy organic strawberries. Please. As much as I love them, I’d rather go without strawberries than eat conventional ones. This time of year, organic strawberries are plentiful and are really no more expensive than the pesticide-soaked ones.

Summer Strawberry Salad
1 large bunch fresh spinach (I know the bagged spinach is convenient, but I don’t think it tastes nearly as good. Buy a bunch of organic spinach — #5 on the Dirty Dozen, btw — fill your sink with cold water, give the spinach a good bath and rinse under running water, then put in salad spinner.)
1 pint organic strawberries, hulled and sliced
1/2 cup pine nuts
1/2 cup shaved hard cheese, such as Dutch Parrano

Red Wine Vinaigrette
3 tbs. red wine vinegar
2 tbs. fresh lemon juice
1 tbs. honey
3 tbs. olive oil
Salt & freshly ground pepper

To make the vinaigrette, put all ingredients in a jar with a lid and shake well. Assemble the salad and toss with the dressing. If you want to get fancy, you can toast the pine nuts on the stove: Put in a skillet on medium-low heat and cook until they start to smell toasty; this only takes a few minutes so don’t take your eyes off them or they’ll burn.